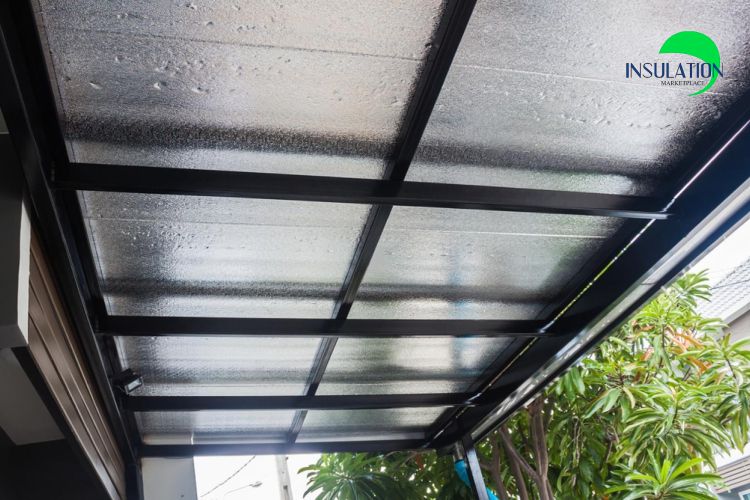
How to Install Bubble Insulation Under Metal Roofing in 9 Simple Steps
Installing bubble insulation under metal roofing is a smart way to boost energy efficiency. It helps maintain comfortable temperatures by preventing heat transfer. Additionally, it reduces condensation, which can lead to damage over time. This guide will walk you through how to install bubble insulation under metal roofing in 9 simple steps.
How to Install Bubble Insulation Under Metal Roofing
Installing double bubble insulation under a metal roof is straightforward. Here’s a detailed guide to help you nail the process easily. Read and follow 9 steps below, and you will know how to install bubble insulation under metal roofing:
Step 1: Check Your Roof Space
Start by inspecting your roof for leaks or moisture issues, as these can affect insulation performance. Fix any damage before you begin. Then, clean the roof thoroughly to remove any dirt or debris so the insulation sticks properly.

How to Install Bubble Insulation Under Metal Roofing
Step 2: Choose the Right Insulation
Pick the right material based on your climate and budget to ensure the best result. If you live in a hot climate, a radiant barrier or bubble core reflective insulation is a great choice because they reflect heat and keep your space cool.
For colder areas, foam core reflective insulation or XPS foam insulation will help trap heat and keep your home warm. Each of these options provides excellent energy efficiency and comfort based on your climate.
Step 3: Measure and Calculate
Accurate measurements are key when learning how to install bubble insulation under metal roofing. First, measure the length and width of your roof area. If you see any obstructions, such as vents, chimneys, or skylights, note it down, as that could affect insulation coverage. Once you have the measurements, calculate the total area in square feet and add a little extra just in case. This helps you avoid running short and keeps your project on track.
Step 4: Gather Necessary Tools and Safety Gear
Make sure you have all the necessary tools:
- Utility knife
- Tape measure
- Staple gun
- Stable ladder
Don’t forget your safety gear:
- Gloves
- Safety glasses
- Dust mask
Using a stable ladder is essential for safe access to the roof. Consider working with a partner to make the job easier and safer.
Step 5: Install Vapor Barriers
If needed, add a vapor barrier to prevent moisture buildup. Vapor barriers are essential in humid areas or places where condensation may occur. They protect the insulation from becoming damp and losing effectiveness.
Follow manufacturer guidelines for placement—typically between the roof deck and insulation. Make sure it’s secure with no gaps, as any breach can allow moisture through, reducing insulation efficiency and potentially damaging your roof structure over time.
Step 6: Place Insulation Between Rafters or Purlins
Fit the insulation between the rafters or purlins, using a staple gun to secure it in place. Be careful not to compress the insulation, as this may reduce its efficiency. Move systematically, section by section, covering the entire roof area. Avoid leaving gaps, as even small spaces can lead to energy loss. Taking time to ensure proper placement will maximize insulation performance and extend its lifespan.

Install Bubble Insulation Under Metal Roofing
Step 7: Seal Gaps and Seams
Inspect the insulation for any gaps or seams once it’s in place. Gaps reduce insulation effectiveness by allowing air to flow through unprotected areas. Use reflective tape to seal any visible gaps. This will create a continuous barrier that prevents heat transfer and helps maintain consistent temperatures.
Step 8: Inspect Your Work
After completing the installation, conduct a thorough inspection of the bubble insulation under the metal roof. Look for gaps, compressions, or misaligned sections that could reduce efficiency. Test the insulation for secure placement and proper sealing. Address any issues immediately to prevent long-term problems.
Can You Put Insulation Directly Under a Metal Roof?
Yes, it’s totally impossible for you to install insulation directly under a metal roof. Insulating your roof is an effective way to maintain temperature control. However, you must follow proper insulation. This will improve insulation performance and prevent moisture problems. When done correctly, it significantly boosts energy efficiency.
Can You Install Insulation Under Metal Roofing Yourself?
Installing insulation under metal roofing is doable for DIYers. Anyone can do it if follow the instructions carefully. The process is straightforward, but precision is important. Accurate measurements and careful installation will give the best results. Incorrect installation can cause moisture buildup and poor performance.
Additionally, mistakes could result in higher energy costs due to poor performance. If you are unsure about any part of the process, you should better hire a professional. They have the experience to ensure proper installation and avoid potential issues. In the end, their expertise will save you time and provide peace of mind.
Otherwise, consider these Do It Yourself Insulation Kits from Insulation MarketPlace, which will help you have the best experience in installing insulation under metal roofing yourself.
Get Quality Insulation for Your Project
Learning how to install bubble insulation under metal roofing is simple and effective. Follow these 9 steps to maintain comfortable temperatures and reduce energy costs. Use the suitable materials for the process. Do not forget to take necessary safety precautions. Finally, inspect your work thoroughly for the best results.
Finding a reliable supplier of insulation products? Check out Insulation MarketPlace for quality options. They offer a wide selection of insulation materials for all your roofing needs. Visit Insulation MarketPlace to get started!


