How To Install Bubble Wrap Insulation Like A Pro
Tired of high energy bills? Struggling with cold winters and hot summers? With traditional insulation, it is often expensive and hard to install. However, the invention of bubble wrap insulation has been a game-changer. It is a simple and budget-friendly solution for every homeowner. With this product, your space is kept comfortable all year. You can use it for multiple places from homes, sheds, to garages. This quick fix makes a big difference without the hassle.
Let’s explore how to install bubble wrap insulation in very simple steps and why it’s a smart choice for your next project.
How To Install Bubble Wrap Insulation
Installing bubble wrap insulation is very simple. Let’s follow the instructions below for the best result:
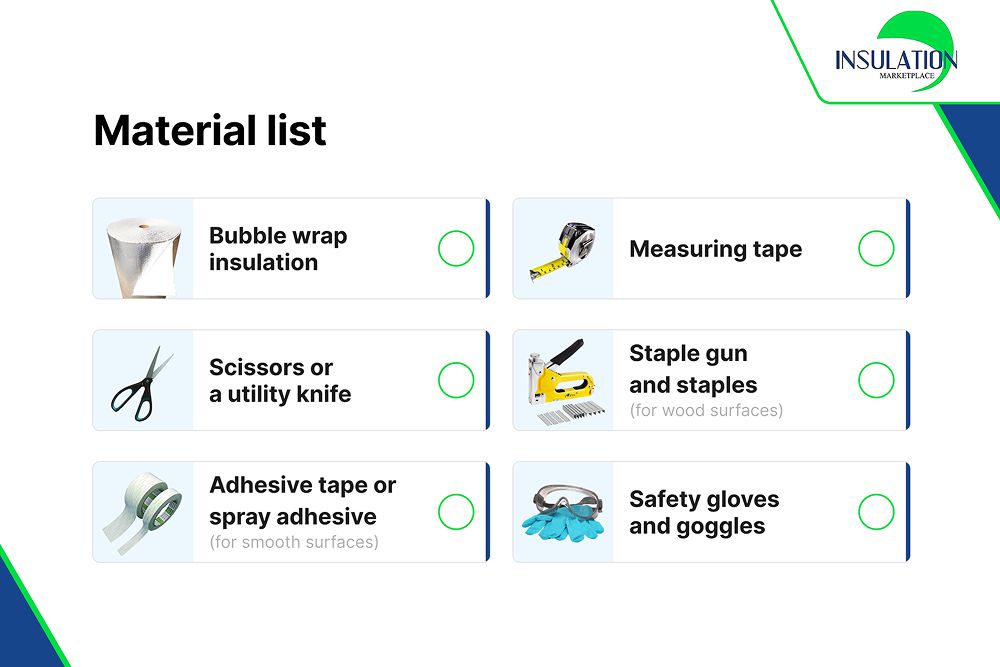
Step 1: Gather Your Materials
Before you begin, prepare these items:
- Bubble wrap insulation
- Measuring tape
- Scissors or a utility knife
- Staple gun and staples (for wood surfaces)
- Adhesive tape or spray adhesive (for smooth surfaces)
- Safety gloves and goggles
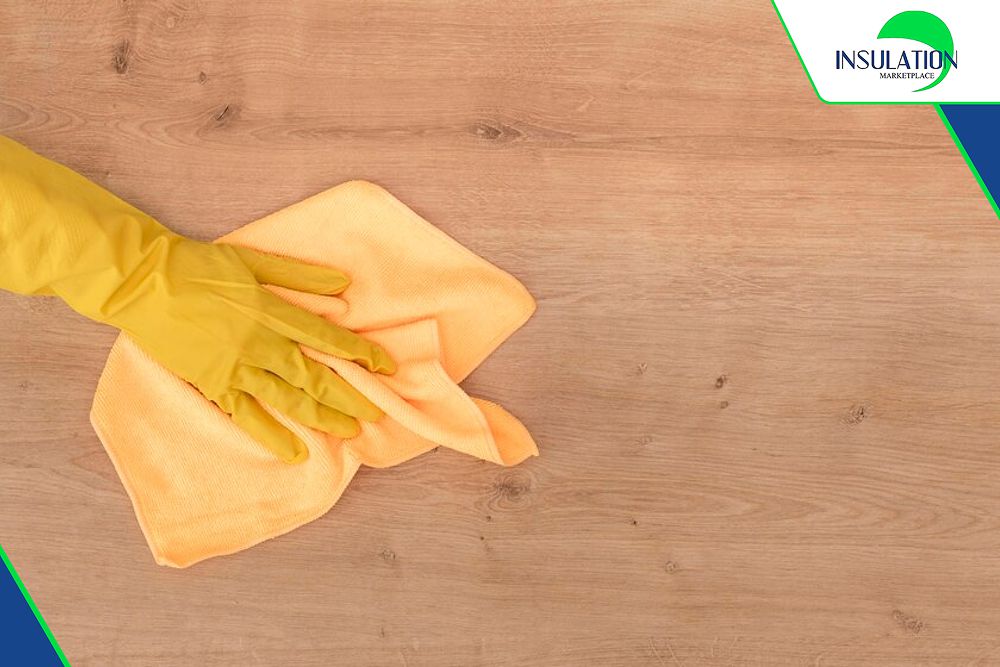
Step 2: Clean the Area
Check the surface on which you will place the insulation. Clean it if there is dust or debris. If the surface has cracks or holes, repair them for smooth installation.
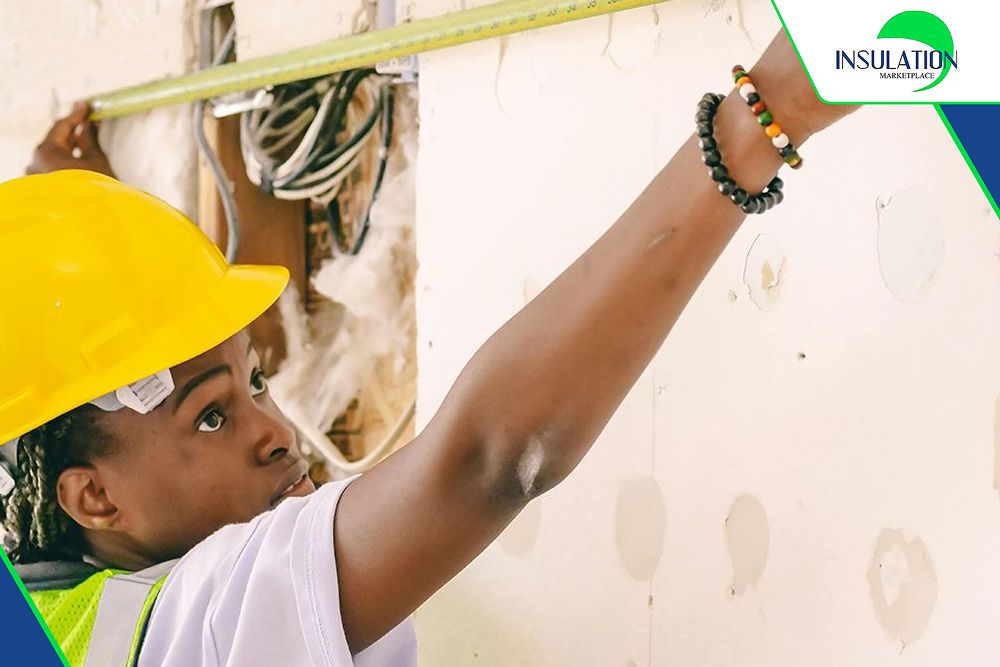
Step 3: Measure the Space
Use a measuring tape to measure the area you want to insulate. Exact measurements help save materials. However, the tip is to leave some space if further adjustments are needed.
Step 4: Cut the Insulation
Cut the bubble wrap insulation to match your measurements. It’s best to cut slightly larger pieces for adjustments during installation. If insulating windows, make sure the piece is big enough to press securely against the glass.
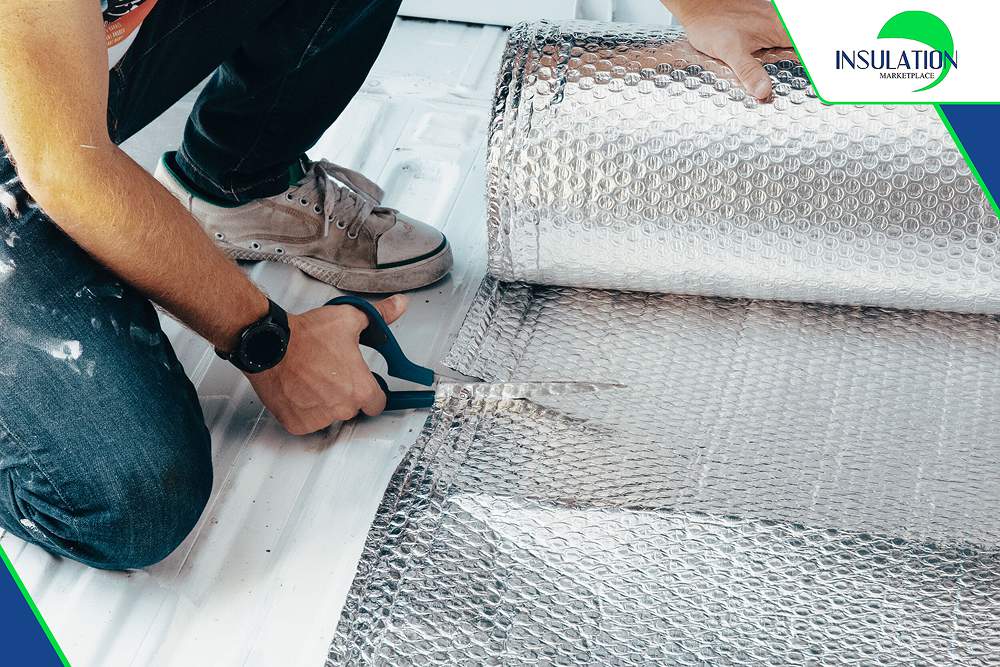
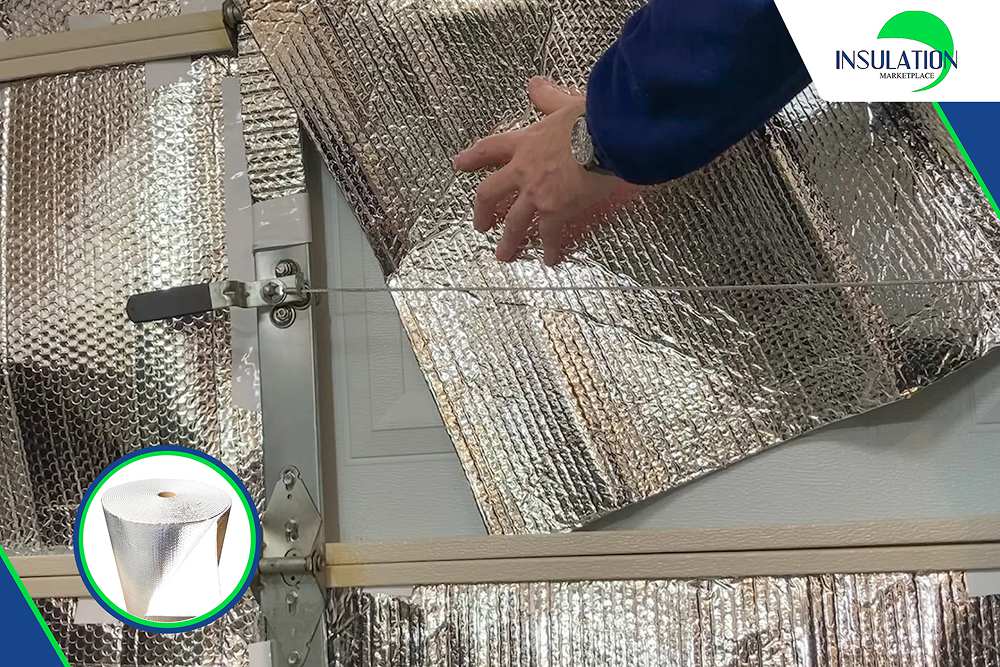
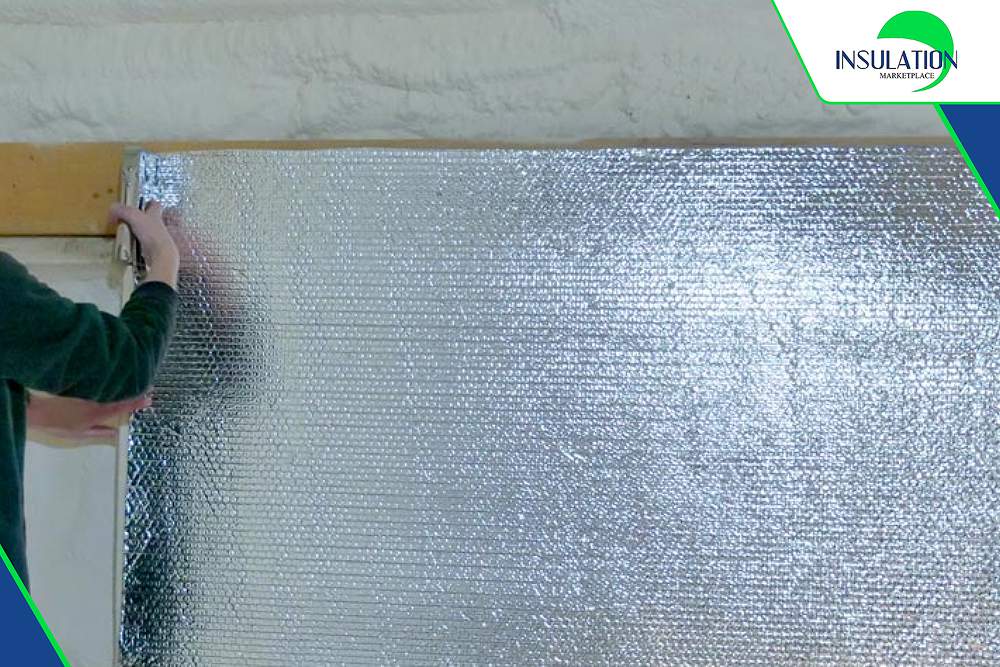
Step 5: Attach the Insulation
Secure the bubble wrap using one of these methods:
- Staples: Ideal for wooden surfaces. Use a staple gun to attach the insulation firmly.
- Tape: Works well for metal, glass, or smooth surfaces.
- Spray Adhesive: Best for uneven surfaces where staples or tape won’t hold.
For windows, the bubble wrap should be pressed against the glass with the bubble side facing inward. The edges should be secured with tape. For walls or attics, the insulation should be applied smoothly. It should be checked to ensure it stays in place.

Step 6: Seal the Edges
All edges and seams should be sealed with reflective foil tape or strong adhesive strips. This helps prevent air leaks and improves insulation performance.
Step 7: Check for Gaps
Before finishing, check the installation for loose areas or gaps. Air should not be able to escape. If gaps are found, extra tape or insulation pieces should be added.
Tips for maximum efficiency:
- Leave a 1-inch air gap between the bubble wrap and the surface.
- For colder climates, if you want to add extra warmth, multiple layers can be added.
- Apply the insulation on both sides of the windows.
- Prioritize some easy-to-lose energy like attics, windows, and doors.

Maintenance Tips for Installing Bubble Wrap Insulation
We have some useful tips that you may need to keep your bubble wrap insulation last longer:
- Inspect regularly: Look for rips, holes, or loose edges. If you notice any, fix them with tape. If needed, buy new insulation.
- Keep it dry: Use a dehumidifier or ventilation.
- Handle with care: Avoid scratching or tearing it when moving furniture or cleaning nearby.
- Clean occasionally: The best practice is to dust it off with a dry cloth. A slightly damp cloth is still okay, but do not soak it.
- Replace when needed: Do this when the insulation starts sagging, tearing, or losing heat.
Why Choose Bubble Wrap Insulation?
Reflective bubble wrap insulation has multiple benefits, making it a smart choice for homeowners and businesses:
- Excellent heat reflection – The reflective layer reduces heat transfer. It keeps spaces cooler in summer and warmer in winter.
- Durable and moisture-resistant – While traditional insulation absorbs water, this bubble wrap does not. Mold and mildew have no chance to grow with this insulation.
- Lightweight and easy to install – The flexible design makes installation simple. You can staple, tape, or use adhesive.
- Cost-effective – It costs less than fiberglass or foam. You save on both materials and labor.
- Non-toxic and safe – It contains no harsh chemicals or fibers. You can handle it without special gear.
One of the best insulations on the market is the SmartBUBBLE Reflective Insulation. There are two options to consider: double-reflective engineered foil or a combination of reflective foil and white poly film. These products come with a 10-year warranty and can be applied to multiple spaces. Be a smart investor with this superior insulation!
Insulate Smarter with SmartBUBBLE
Insulated bubble wrap is an easy and affordable way to keep your space comfortable. It’s simple to install and needs little maintenance. Follow these steps on how to install bubble wrap insulation and enjoy better insulation with lower energy bills!
SmartBUBBLE Reflective Insulation creates a more comfortable space by blocking unwanted heat and trapping warmth where needed. No more unbearable heat waves or chilly drafts—just a cozy home, shed, or attic. Plus, it comes with a 10-year warranty for a lasting upgrade. Get yours today at Insulation MarketPlace!
FAQs
How flexible is bubble wrap insulation?
Bubble wrap insulation is very flexible. It bends easily around pipes, corners, and uneven surfaces. The design is light, making installation simple. It is hard to creak or break when applied to walls, roofs, or floors, making it perfect for DIY and professional use.
How many types of bubble wrap insulation are there?
There are two main types:
- Single Bubble Insulation: One layer of air pockets between reflective sheets. Great for moderate insulation.
- Double Bubble Insulation: Two layers of air pockets for better insulation and moisture resistance.
How effective is bubble wrap for insulation?
Bubble wrap insulation, like SmartBUBBLE from Insulation MarketPlace, is effective at reducing heat transfer by creating an air barrier. It helps reflect radiant heat, making it useful for temperature regulation in attics, garages, sheds, and water heaters.